FloPy is a Python package that allows you to create, run, and post-process MODFLOW models. Essentially, this is an interface for working with MODFLOW, albeit not in a graphical format like typical software such as GroundwaterVistas or ModelMuse, but rather through program code. Below, you will find instructions on installing FloPy and getting started with it.
Installation of Python #
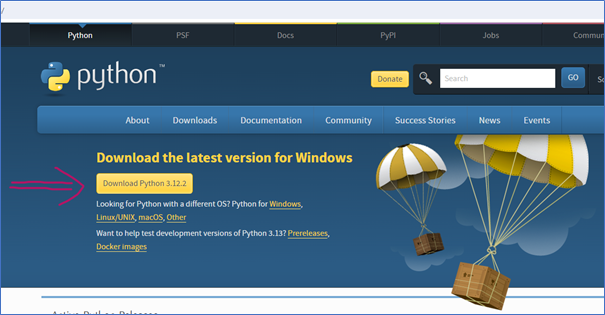
- Install the current version of Python from the official website.
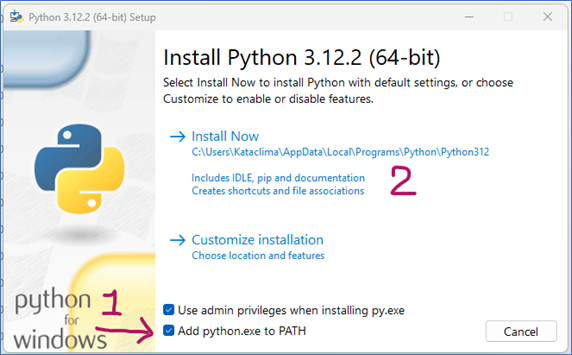
- During the Python installation process, check the Add Python to path option, leaving the other parameters at their default settings, then click on Install Now.
Download and storage of MODFLOW executable files #
- Download the MODFLOW packages .exe files you may need; hereafter there are some of the most used packages, their executable file names, and their link for the download.
| Exe file name | Package | Download link |
| mf2005.exe | MODFLOW 2005 | https://water.usgs.gov/water-resources/software/MODFLOW-2005/ |
| mf6.exe | MODFLOW 6 | https://water.usgs.gov/water-resources/software/MODFLOW-6/ |
| mfusg.exe | MODFLOW-USG | https://water.usgs.gov/water-resources/software/MODFLOW-USG/ |
| mpath7.exe | MODPATH 7 | https://water.usgs.gov/water-resources/software/MODPATH/ |
| mt3dms5b.exe | MT3DMS | https://github.com/MODFLOW-USGS/mt3dms?tab=readme-ov-file |
| mt3d-usgs_1.1.0_64.exe | MT3D-USGS | https://water.usgs.gov/water-resources/software/MT3D-USGS/ |
| swt_v4.exe | SEAWAT | https://water.usgs.gov/water-resources/software/SEAWAT/ |
| pest.exe, plproc.exe, various others | PEST, PLPROC, Groundwater Utilities | http:\\www.pesthomepage.org\Downloads.php |
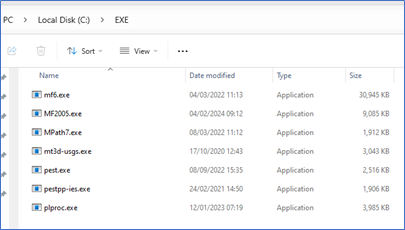
- For MODFLOW and PEST .exe files, it is recommended to create a folder in the C: directory of your PC, in order to create a short path as C:\EXE.
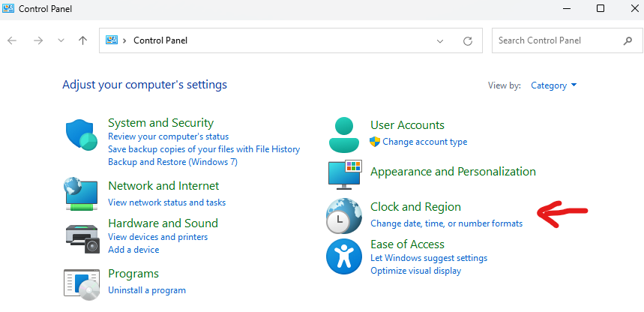
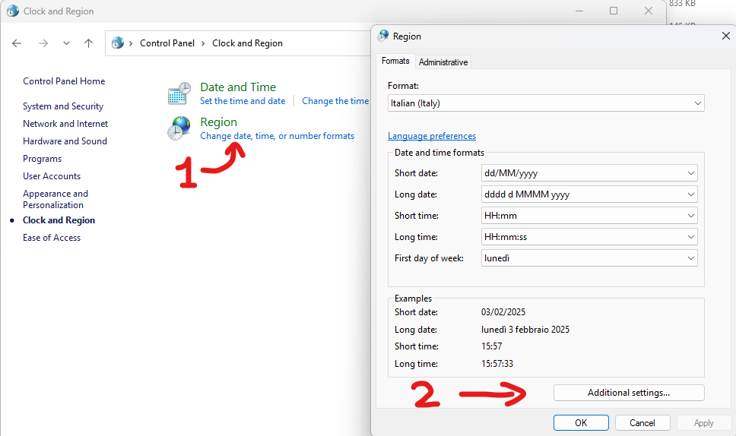
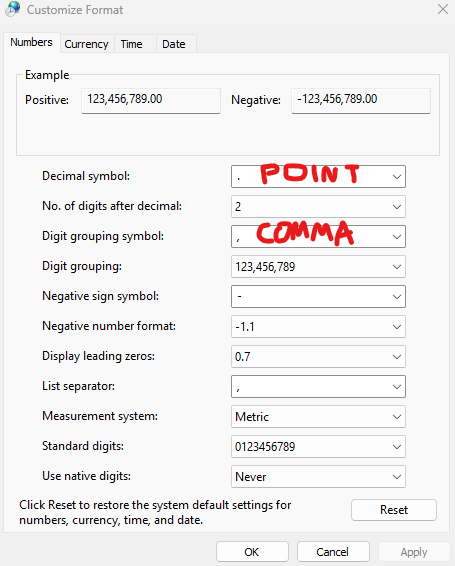
- In some countries (such as Italy), there is a quite banal (but common!) reason why our first modelling approaches “do not work” (regardless of using FloPy or modeling GUIs), and usually this reason is not written anywhere. MODFLOW & Co. need to read real numbers with decimals separated by points. The most common operations to address this are as follows: • Go to Control panel > Clock and Region > Region > Additional settings… • Select the point as decimal symbol and comma as digit grouping symbol. • Apply and close
- Other tips/rules to follow are: • Do not use long paths for the model working directory, i.e., don’t store them on your desktop. • Use only the Latin alphabet. • Each model must be stored in its own folder.
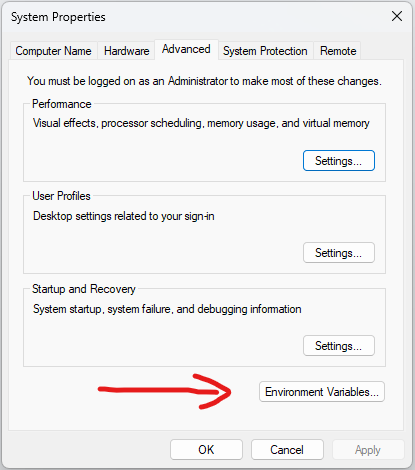
- For FloPy to access MODFLOW executables files, it must be set their path in the system environment variables. Go on Control Panel | System and Security | System | Advanced system settings | Advanced and then click on Environmental Variables or in the Start menu just enter “Edit system environment variables”.
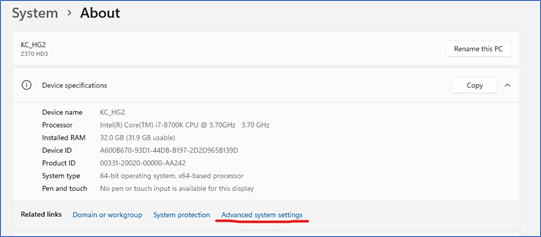
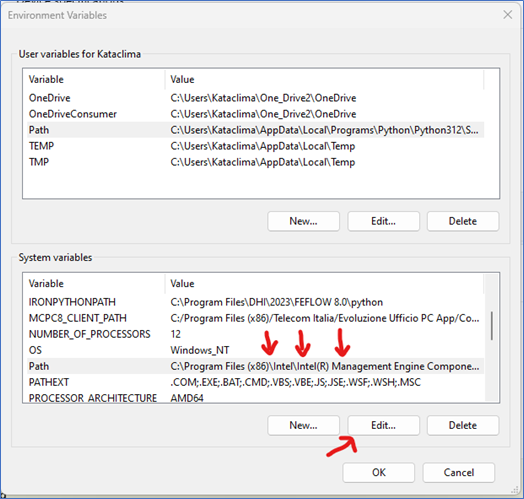
- In the window that opens, in the System variables block, select the Path variable and click Edit.
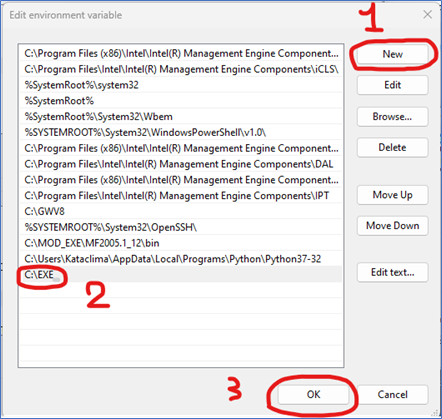
- Create a new path by clicking on New…, type the path to your executable files repository, and then click OK.
Installation and Test Run of FloPy #
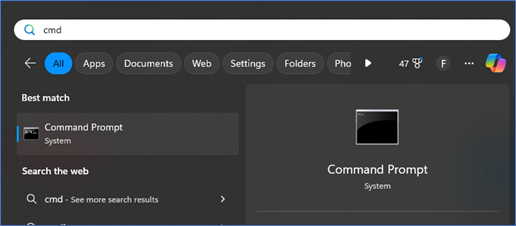
- Click on Start and enter cmd in the search field, then launch the command line.
- Inside the command line, enter pip install flopy: the download should start (internet connection is required!).

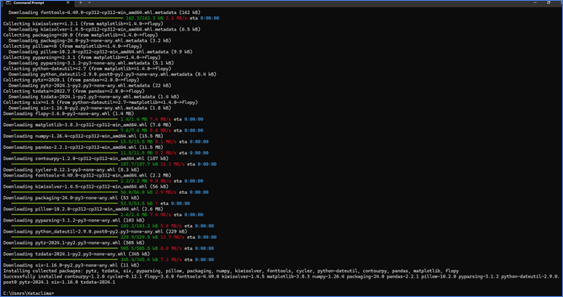
- Create an environment for working with FloPy. A suitable solution could be Jupyter Notebook: it allows to visualize simulation results on the fly and share code with colleagues.
- Install Jupyter Notebook via the command line: enter pip install jupyterlab and wait for the installation to complete.
- Now enter pip install jupyter notebook in the command line.
- Create a folder, i.e. JupiterBook, on your pc (in C: as usual is good) in which the code files will be stored.
- In the new folder, open the command line by replacing the path in the address field with cmd and press Enter.
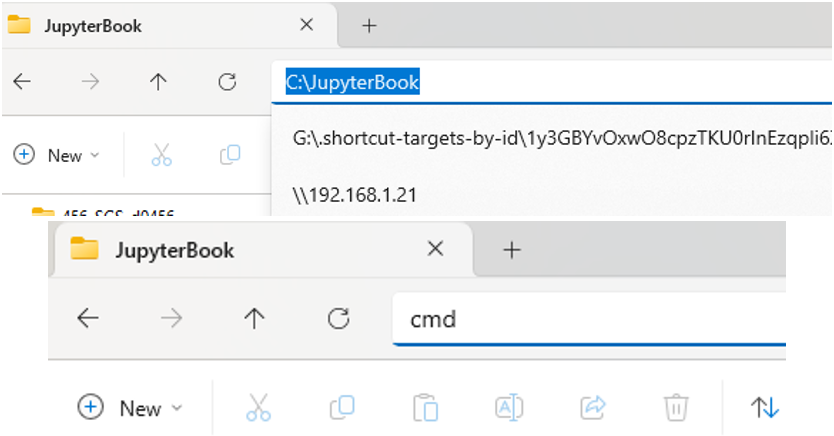
- In the command line, enter jupyter notebook and then Enter.

- The default browser will open. Click on New at the top right and select Python3 (ipykernel).


- In the input field, copy the code of this test model, as shown in the picture below.
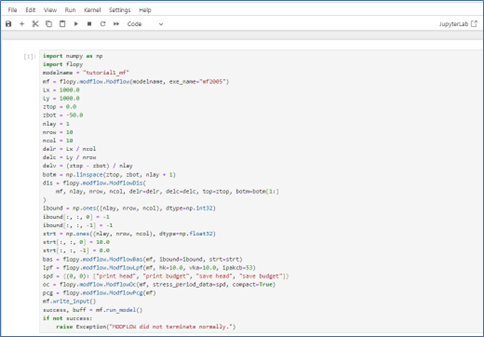
- Click on the Run button.
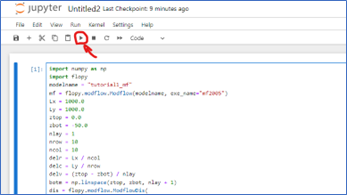
- If everything is done correctly, you should see a new cell with the following text file displayed.
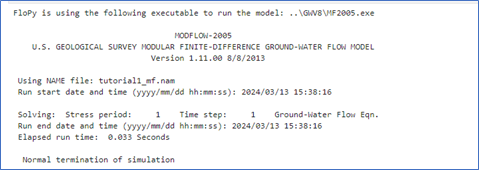
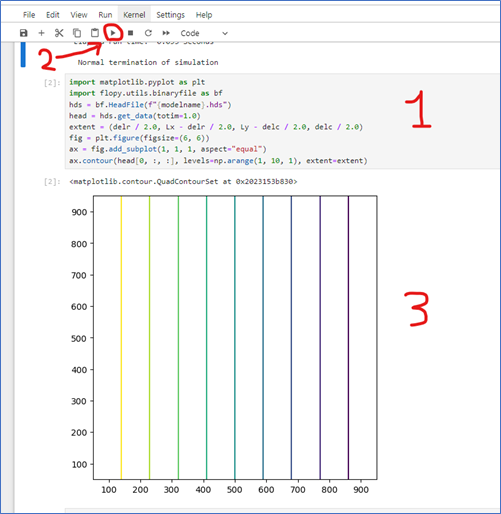
- If you want to look at the results of the model run, enter the code provided in the webpage as it follows. Then click on the run button: you should see the contour plots of the model’s heads.
